I dug an old 3.5 inch floppy drive out of the junk box and took apart one of the Microvax 2000s and started to install it. I did't get very far - the connector on the MicroVAX 2000, for the RX33 is a card edge connector. The connector for a 3.5 inch floppy is a normal IDC pin socket sort of affair. Here's a picture of the stock cable. The card edge connector for the floppy drive is the bottom one.
The cabling for the hard drives and floppy drive on an MV2000 has a 50 pin connector on one end, and three card edge connectors on the other. Two of the card edge connectors are for connecting to an ST506 hard drive. The third section is for the RX33. A little study showed I just needed to cut off the card edge connector for the RX33 and crimp on a normal IDC pin connector, with the wires attached in the same order as they were on the connector removed. That is, wires 1 and 2 go to pins 1 and 2. Skip pins 3,4,5,6. Connect wires 3,4,5,6,7,8 to the next 6 pins, then skip pins 13 and 14. Then connect the rest of the wires to the rest of the pins, in order. You can see which wires go where and what pins to skip if you look at the existing MV2000 RX33 cable connector - it's card edge connector is pin for pin wired the same as the IDC connector you'll be substituting for it.Here's a stock connector with the floppy edge connector cut off, and the IDC connector that will replace it.

This worked, but, it didn't leave me a lot of cable slack, which makes putting the thing back together a real exercise in manual dexterity. I decided to make a complete new cable. This was easy for me, since I am not using an RD series hard disk (I use SCSI for the system disk), so I can leave off the other two cables and connectors.
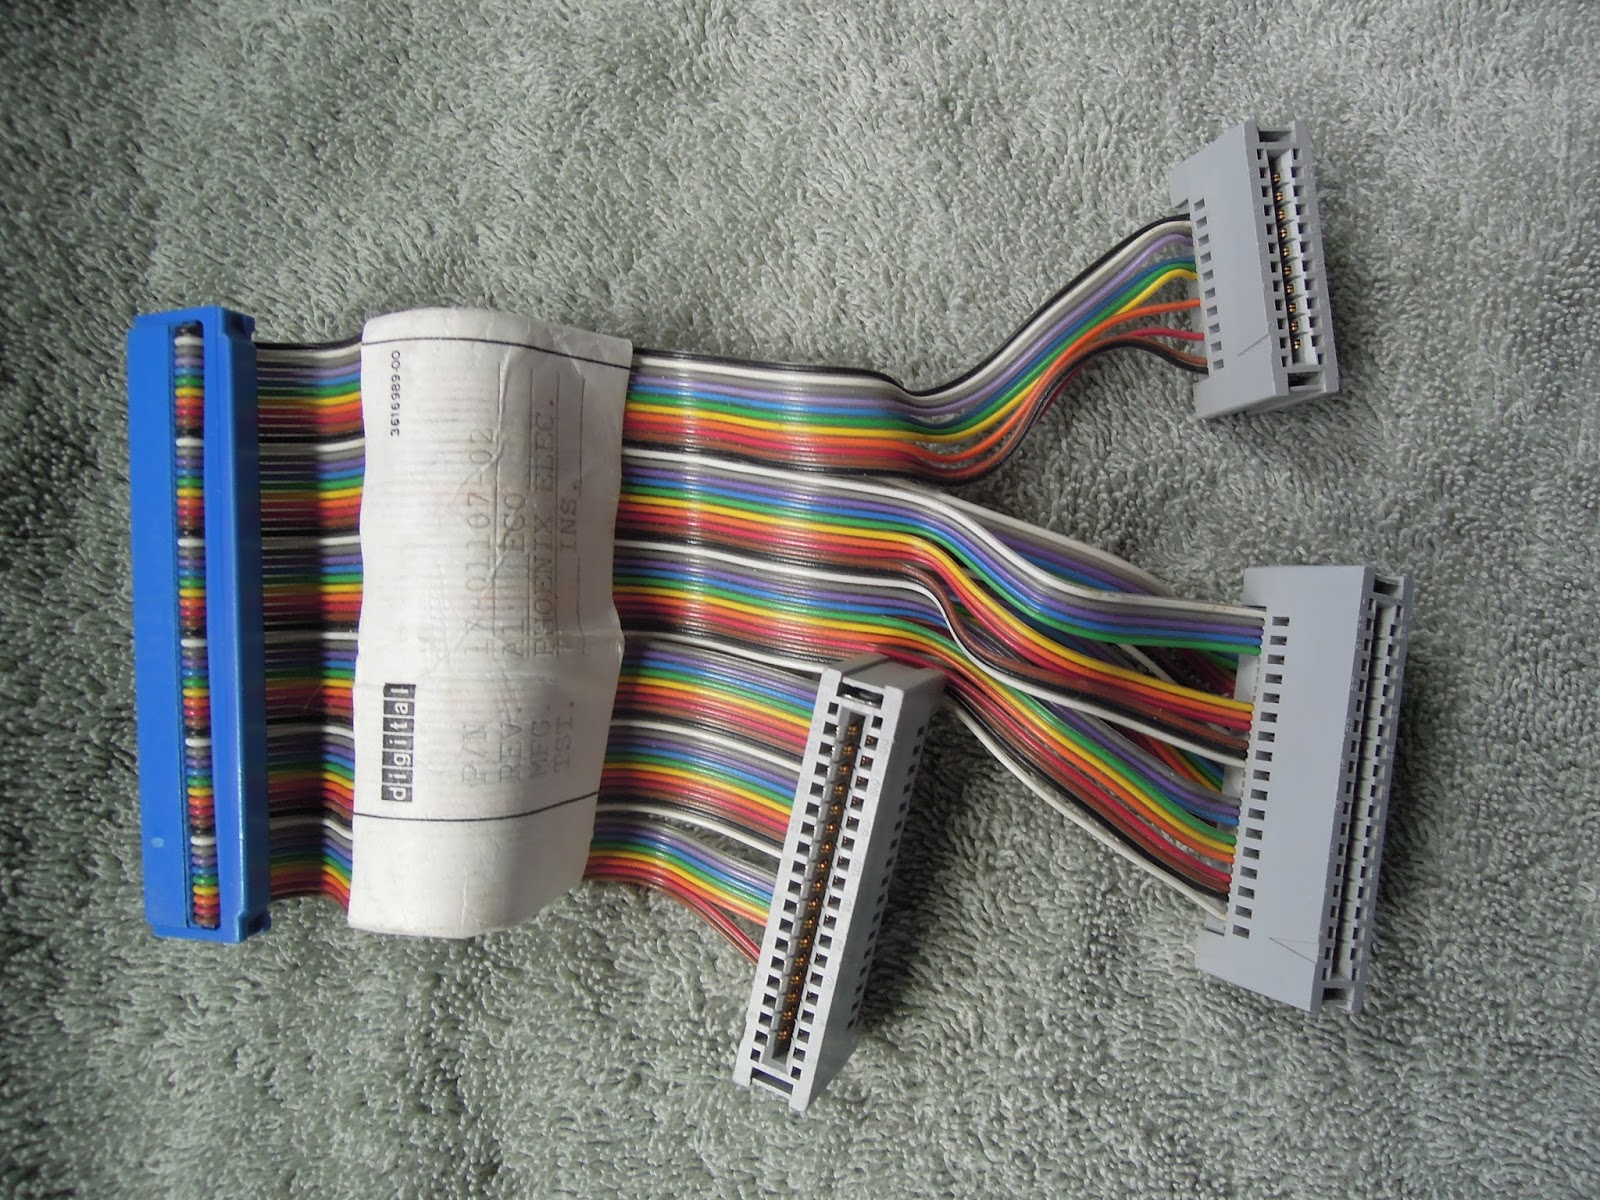
So, like I said, the 50 pin connector from the MV2000 is split into three parts. The first part we've been talking about already, the floppy drive part. The other two parts lead to two card edge connectors for the RD series hard drive that MV2000s used for system drives. I didn't need those, so I left them off, and just crimped a 28 pin cable into pins 1 through 28 on the 50 pin connector. If you are still using an RD drive for the system disk, you'll need to add cable for these two connectors, and two card edge connectors as well. Here is my new cable, with the 50 pin connector already connected, and the 34 pin connector that gets crimped on to the other end.

This picture doesn't show the cable end separated up for the skipped pins yet.
There's good pinout poop about all this at http://home.iae.nl/users/pb0aia/vax/vs2khw.html. It's got pretty much all the info you need. I've probably muddled things up by trying to explain it...
OK, maybe all the above is obvious, but it took me several days to figure it out.
One thing I discovered in this process, is that the convention used on 5.25 inch floppy drivers, and most hard drives, that pin 1 on the interface cable is located nearest to the power connector, does not apply to all 3.5 inch floppy drives. It turned out the floppy drive I was using had pin 1 on the far side from the power connector rather than the near side. You'll know if you get it wrong and plug in backwards - the floppy drive activity LED will come on constantly, and the drive won't work.
Another tip - in order to work, you have to jumper the floppy drive as DS0. Then it shows up as the third drive, DUA2:. Why? I dunno. Drive select technology for floppy drives is a long and boring complicated subject, and since I have a solution that works, I choose not to analyze it in depth.
Alrighty then - that takes care of the hardware. At this point the 3.5 inch floppy drive will show up...as an RX33. That means it will be 1.2 MB in size. An interesting situation, but, since this whole computer rodeo got started because I wanted to read some existing 1.44 MB floppies, not that useful a situation. As well, I'd like to be able to write floppies that other 3.5 inch floppy drives could read, so...not good...
Not a real problem, though. A little time spent searching Google showed that someone else had already addressed this issue. Way back in 1995, Peter Coghlan wrote some patches to DVDRIVER, the MicroVAX 2000 floppy driver, that take care of this problem. His patches cover VMS versions 5.5-1 and 5.5-2. I'm on VMS 7.3, though. A little study of the device driver and his patches enabled me to find out where to make the corresponding changes in the new version. Peter has given me permission to post his work on this, with my 7.3 changes added. Here's the file, called PATCHDVDRIVER.TXT. It's a VMS command file - the .TXT extension is required because Google sites is allergic to the .COM file extension.
PATCHDVDRIVER.TXT
There's lots o' instructions in the file. Basically, save it as a file with the .COM extension, then execute it. It will patch DVDRIVER.EXE to support the floppy as an RX23 instead of an RX33. Reboot, and Bob's your uncle - you'll see a device DUA2, and it will show up as an RX23, appropriately sized..